How to Interface GSM Module to 8051 Micro Controller-Send and Receive SMS
This article is about interfacing GSM module to 8051 microcontroller. GSM module has become a very commonly occurring hardware in embedded system applications and the knowledge on how to interface GSM module with microcontroller is very essential if you want to become a good embedded system designer.
GSM module
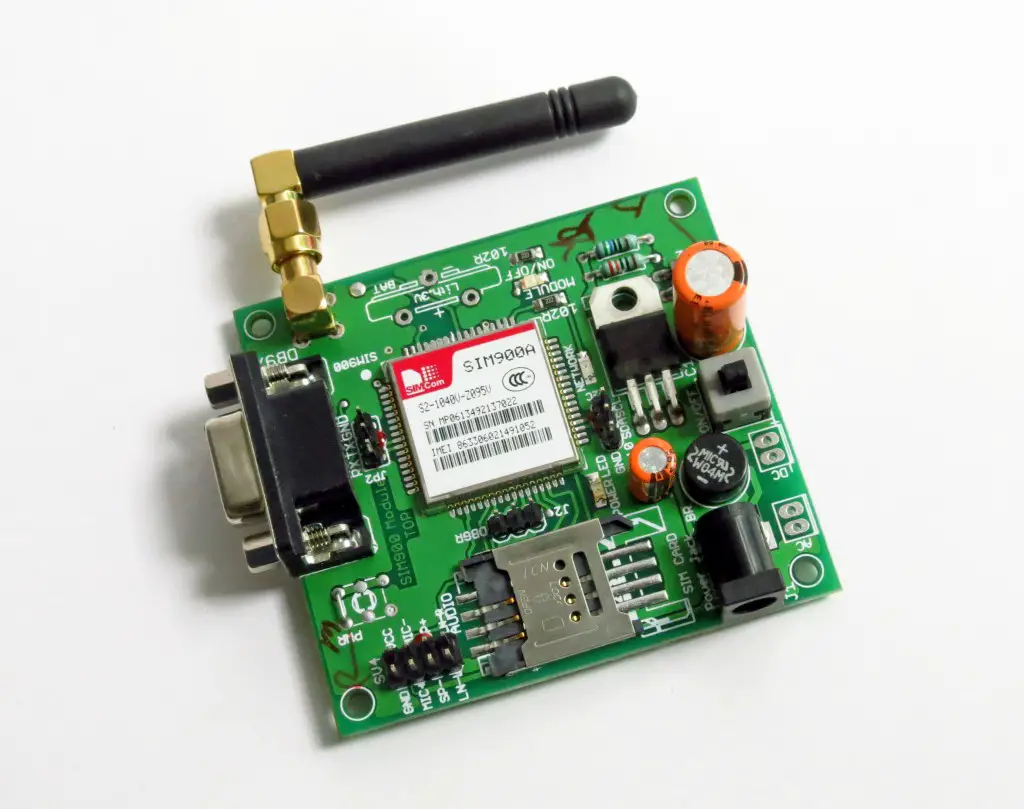
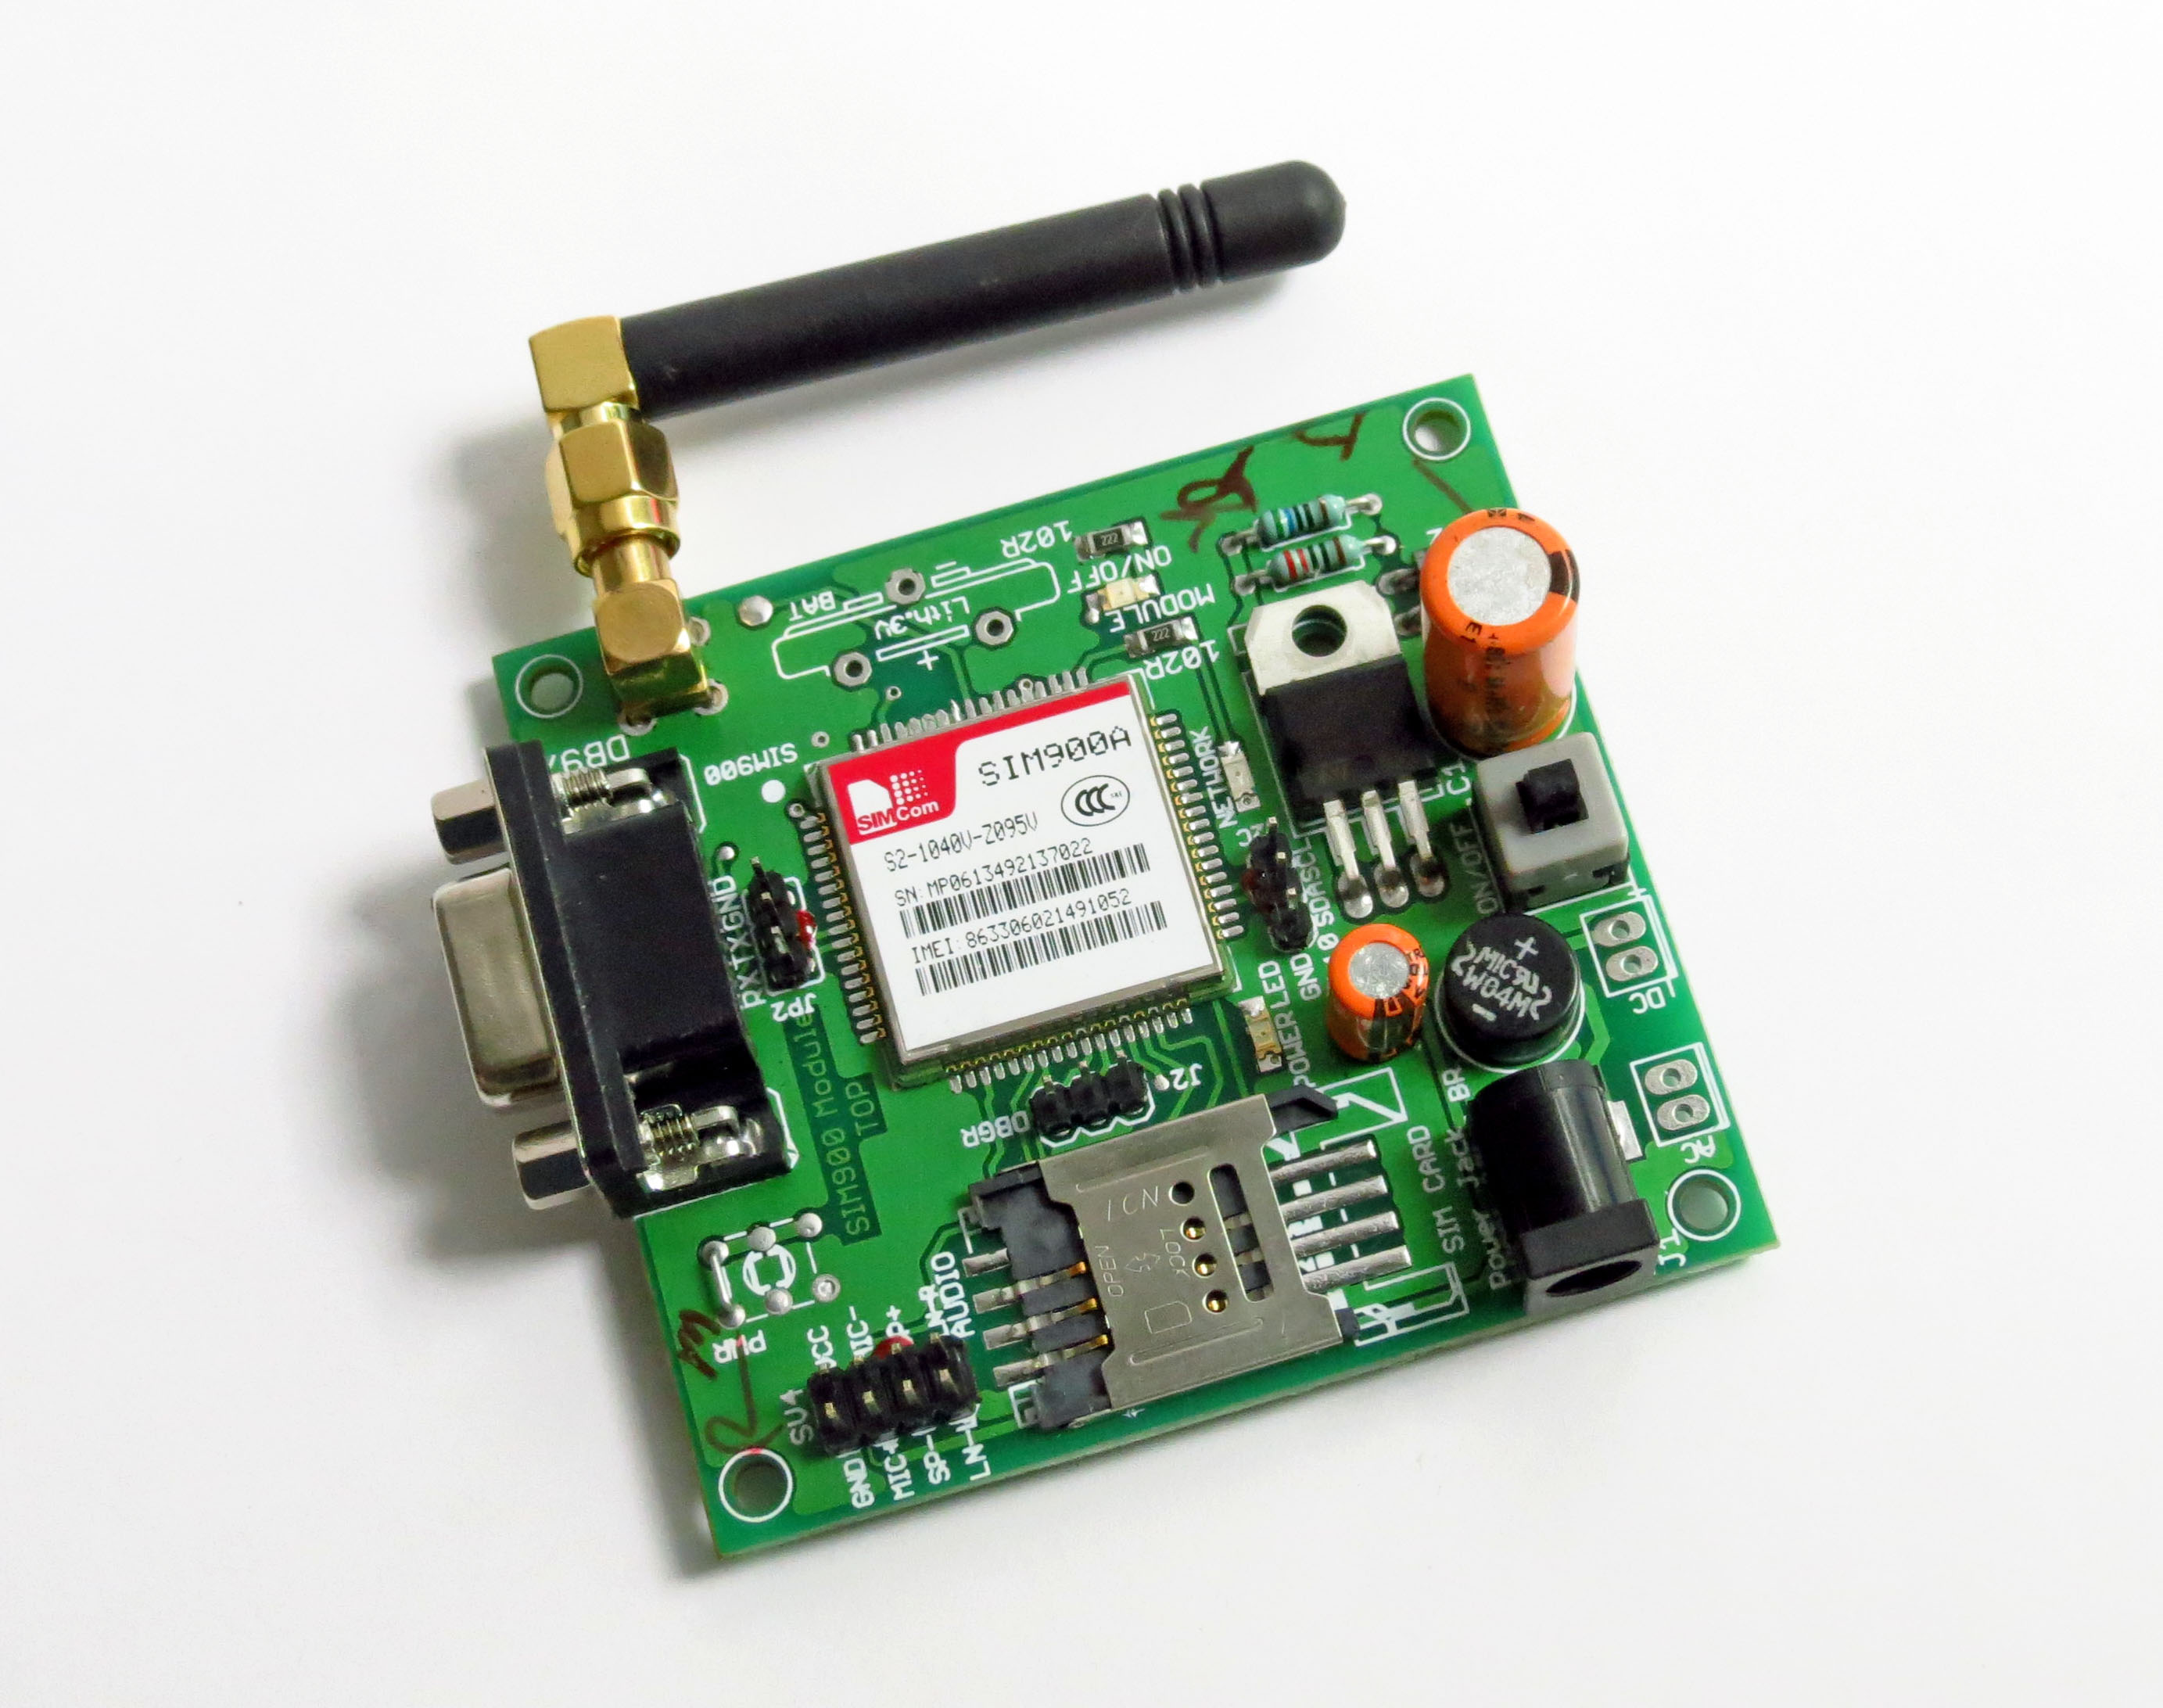
GSM (Global System for Mobile communications) module is basically a modem which accepts a SIM card and works in the GSM network provided by the operator just like a mobile phone. The GSM module can be controlled by a computer or a microcontroller to do different tasks in the network such as calling, sending messages, accepting messages, sending FAX etc. The GSM module usually communicates with the parent hardware by means of serial communication. If the parent hard ware is a personal computer, the communication is usually done through the serial port (RS232) and if the parent system is microcontroller based, the communication is through the TTL pins Rx and Tx. Advanced GSM modules may even have bluetooth or Wi-Fi connectivity. Common applications of GSM module are message delivery/reception systems, mobile based appliance control systems or simply any data communication application which is supported by the GSM network provider and the GSM module.
GSM Module – Buyers Guide – are you looking to buy a GSM module? There are a handful of product variants for GSM module – like SIM900, SIM300, SIM800 etc. We have created this buyers guide to help you select the right GSM module for your project needs.
The parent hardware (PC or uC) does different tasks with the GSM module by sending different different commands and the data to the module in a suitable order and format. The GSM module we are using here is SIM900 type and commonly used SIM900 and the task we are doing here with the module is to send a message to a mobile phone The commands and their format required for this application are given below.
AT to check the modem.
AT+CMGF=1 to configure the GSM module to SMS mode.
AT+CMGS=”mobile number“ to send the mobile number to the GSM module.
CTRL+Z to send the message.
Circuit diagram.
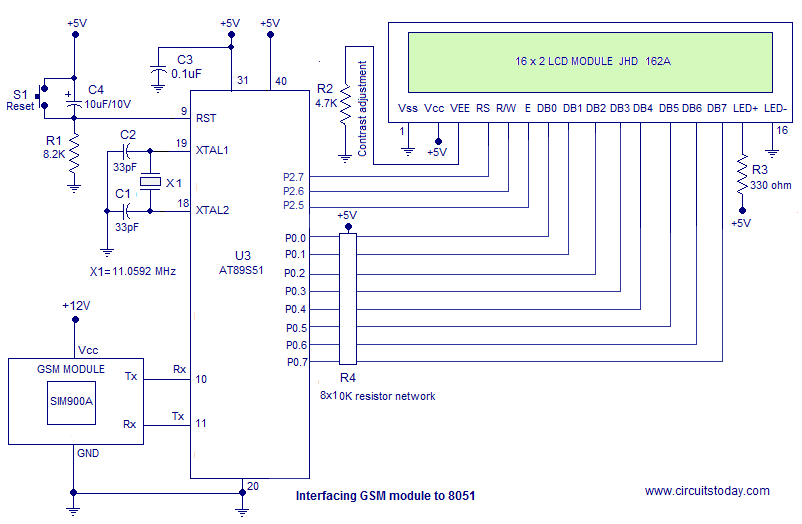
The circuit diagram for interfacing GSM module to 8051 microcontroller is shown above. Here the GSM module and the microcontroller communicates in between using serial communication. Rx pin of the 8051 is connected to Tx pin of the GSM module and Tx pin of the 8051 is connected to the Rx pin of the GSM module. The LCD module is involved in this project to give an indication message when the SMS is sent. Switch S1, capacitor C4 and resistor R2 are associated with reset circuit of the microcontroller. Capacitor C1, C2 and crystal X1 are associated with clock circuit. C3 is just a noise by-pass capacitor. Resistor R2 is used to set the contrast of the LCD display. Resistor R3 limits the current through the back light LED.
Program.
ORG 000H
MOV TMOD,#00100001B
MOV TH1,#253D
MOV SCON,#50H
SETB TR1

RS EQU P2.7
RW EQU P2.6
E  EQU P2.5

MAIN: ACALL DINT

MOV A,#"A"
ACALL SEND
MOV A,#"T"
ACALL SEND
MOV A,#0DH
ACALL SEND
ACALL DELAY1


MOV A,#"A"
ACALL SEND
MOV A,#"T"
ACALL SEND
MOV A,#"+"
ACALL SEND
MOV A,#"C"
ACALL SEND
MOV A,#"M"
ACALL SEND
MOV A,#"G"
ACALL SEND
MOV A,#"F"
ACALL SEND
MOV A,#"="
ACALL SEND
MOV A,#"1"
ACALL SEND
MOV A,#0DH
ACALL SEND
ACALL DELAY1


MOV A,#"A"
ACALL SEND
MOV A,#"T"
ACALL SEND
MOV A,#"+"
ACALL SEND
MOV A,#"C"
ACALL SEND
MOV A,#"M"
ACALL SEND
MOV A,#"G"
ACALL SEND
MOV A,#"S"
ACALL SEND
MOV A,#"="
ACALL SEND
MOV A,#34D
ACALL SEND
MOV A,#"+"
ACALL SEND
MOV A,#"9"
ACALL SEND
MOV A,#"1"
ACALL SEND
MOV A,#"9"
ACALL SEND
MOV A,#"5"
ACALL SEND
MOV A,#"4"
ACALL SEND
MOV A,#"4"
ACALL SEND
MOV A,#"3"
ACALL SEND
MOV A,#"4"
ACALL SEND
MOV A,#"0"
ACALL SEND
MOV A,#"0"
ACALL SEND
MOV A,#"7"
ACALL SEND
MOV A,#"7"
ACALL SEND
MOV A,#34D
ACALL SEND
MOV A,#0DH
ACALL SEND
ACALL DELAY1


MOV A,#"H"
ACALL SEND
MOV A,#"E"
ACALL SEND
MOV A,#"L"
ACALL SEND
MOV A,#"L"
ACALL SEND
MOV A,#"O"
ACALL SEND
ACALL DELAY1

MOV A,#1AH
ACALL SEND


ACALL DELAY1


ACALL DINT
ACALL TEXT1
ACALL DELAY1
HERE1:SJMP HERE1


SEND:CLR TI
     MOV SBUF,A
WAIT:JNB TI,WAIT
     RET


DELAY1:MOV R6,#15D
BACK: MOV TH0,#00000000B
      MOV TL0,#00000000B
      SETB TR0
HERE: JNB TF0,HERE
      CLR TR0
      CLR TF0
      DJNZ R6,BACK
      RET

DELAY: CLR E
    CLR RS
    SETB RW
    MOV P0,#0FFh
    SETB E
    MOV A,P0
    JB ACC.7,DELAY
    CLR E
    CLR RW
    RET

 DISPLAY:MOV P0,A
    SETB RS
    CLR RW
    SETB E
    CLR E
    ACALL DELAY
    RET


CMD: MOV P0,A
    CLR RS
    CLR RW
    SETB E
    CLR E
    ACALL DELAY
    RET

 DINT:MOV A,#0FH
    ACALL CMD
    MOV A,#01H
    ACALL CMD
    MOV A,#0CH
    ACALL CMD
    MOV A,#06H
    ACALL CMD
    MOV A,#81H
    ACALL CMD
    MOV A,#3CH
    ACALL CMD
    RET

 TEXT1: MOV A,#"S"
    ACALL DISPLAY
    MOV A,#"E"
    ACALL DISPLAY
    MOV A,#"N"
    ACALL DISPLAY
    MOV A,#"T"
    ACALL DISPLAY
    MOV A,#" "
    ACALL DISPLAY
    MOV A,#" "
    ACALL DISPLAY
    MOV A,#" "
    ACALL DISPLAY
    RET

 END
About the program.
Timer 1 of the 8051 is is configured Mode 2 for serial communication. Timer 0 of the 8051 is configured as Mode 1 timer for creating few delays used in the program. TMOD register is loaded with 00100001B for this purpose. TH1 is loaded with 253D for setting the baud rate to 9600. The relevat equation is TH1 = 256 – ((Crystal / 384) / Baud) where crystal frequency is in Hz. The crystal we are using here is of 11.0592 MHz and the baud rate we need is 9600. When substituting these values in the above equation, we get TH1=256-((11.0592/384)/9600)=253. SCON register is loaded with 50H for setting the serial port mode to Mode1 and receiver enabled.
The next part is controlling the GSM module for performing our task which is to send a predetermined message to a given mobile number. For this, first you need to send the command AT to the GSM module for checking the status. The format is AT/r.This is done by sending the ascii code of A , then ascii code of T and ascii code of /r ( carriage return) to the GSM module one by one.The ascii code of carriage return is 0DH.
Next you have to send the command AT+CMGF=1 to the GSM module for configuring the GSM module in the SMS mode. The format is AT+CMGF=1/r.This is done by sending the ascii code of A, then ascii code of T, then ascii code of + ,then ascii code of c, then ascii code of M, then ascci code of G, then ascii code of F, then ascii code of =, then ascci code of +,then ascii code of 1 and finally the ascci code of /r.
Next you have to send the command AT+CMGS=”mobile number” to the GSM module for sending the target mobile number to the GSM module. The format is AT+CMGS=”mobile number”/r. GSM module for configuring the GSM module in the SMS mode. The format is AT+CMGF=1/r.This is done by sending the ascii code of A, then ascii code of T, then ascii code of + ,then ascii code of c, then ascii code of M, then ascii code of G, then ascii code of s, then ascii code of =, then ascii code of “, then ascii code of of each of the mobile number one by one, then the ascii code of” and finally the ascii code of /r.
Then you need to send the message text to the GSM module. This is done by sending the ascii code of each letters in the text to the GSM module one after another.Finally the ascii code of CTRL+Z (substitute) is send to the GSM module for sending the message. The ascii code of CTRL+Z in HEX format is 01AH. A delay of 1 second has to be introduced between each commands for giving the GSM module enough time to accept and execute each commands. The entire procedure can be simply written as given below.
AT/r

1S delay.

AT+CMGF=1/r

1S delay.

AT+CMGS="mobile number"/r

1S delay.

message text.

1S delay.

CTRL+Z

1S delay.
Serial communication is used for sending ascii codes of individual letters of the different commands to the GSM module. This is done by loading the ascii code of each letter to accumulator A and calling the subroutine SEND. The subroutine SEND works by clearing the transmit flag bit TI of the SCON register and the loading to content in accumulator A to SBUF register. The transmit flag TI will be set by the uC when the transmission is complete. The subroutine monitors this flag and exits when it is found to be set. The status of the TI flag is checked using JB instruction.
The text “SENT” is displayed on the LCD module after the last command ie; CTRL+Z is sent to the GSM module. The method used for interfacing the LCD module to the microcontroller is the classic 8 wire interface mode. Read the article Interfacing LCD module to 8051 for understanding this part well.
The program is halted there using the code HERE1:SJMP HERE1 after the message SENT is displayed on the LCD. If this is not done so, the program will loop infinitely and send the message again and again. You need to press the reset button manually to send the message again.
Notes.
- The GSM modules available in the market comes with different supply voltages like 12V, 9V, 5V etc. The module I am using here operates on 12V. So give the power supply to the module according to your GSM modules datasheet.
- The GSM module requires some time to get in to the network after it is switched ON. There will be an indicator LED on the GSM module for this purpose. In most GSM modules the network indicator LED starts blinking in a fixed rate when the GSM module is ready to use.
- Make sure that your SIM card has enough cash balance and it matches with GSM module you are using.


No comments:
Post a Comment