Android controlled robot car
Smartphone operated appliances and applications are getting popular now a days since the increase in usage of smartphones and people likes to get things done using their smartphones. Here is we are going to see a similar smartphone based wireless robot car controlled by famous smartphone platform Android. These kind of systems can be widely used for surveillance and other tracking stuffs.
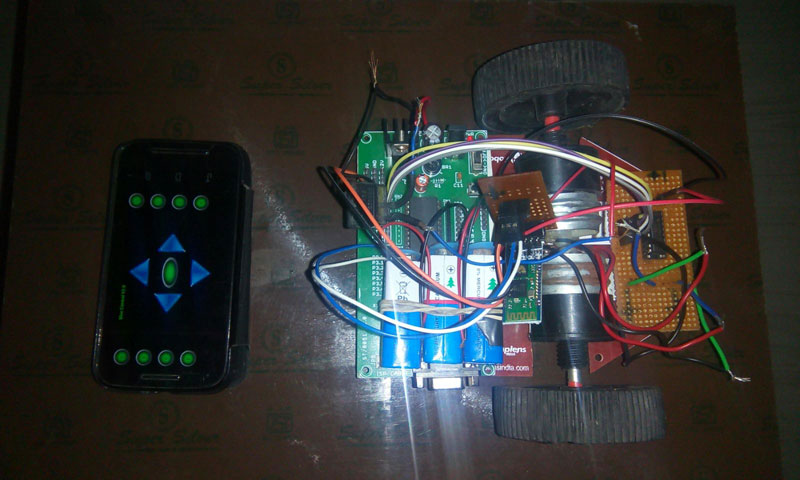
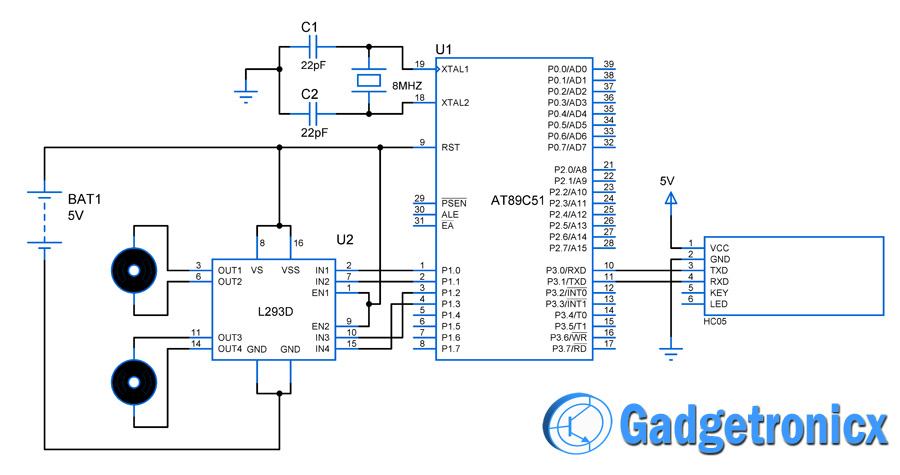
The above Circuit diagram shows the design of the robot car we are about to build. The design shows it uses a simple Bluetooth Module HC05 to establish connection with a Android smartphone. On the other hand a motor drive IC L293D was used to drive the motors of the car since Microcontroller cannot drive a motor directly. These two motors form the left and right wheel of the robot as shown in the picture.
| NAME | COUNT | LINK TO BUY |
| AT89C51 | 1 | – |
| HC05 | 1 | Buy Here |
| Android Mobile Phone | 1 | Buy here |
| DC motor | 2 | Buy here |
| Robot wheel | 2 | Buy here |
| Batteries | 1 | Buy here |
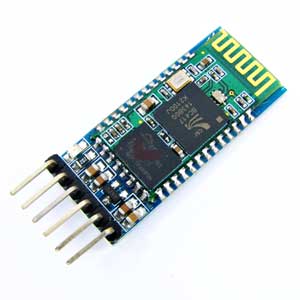
HC05 is a bluetooth serial transceiver which is capable of providing connection between devices through serial communication or UART protocol. This module consists of a TX and RX pins like we see in other UART enabled devices and through these pins the BT communication will take place.
Now the robot part is ready and we need to set up our android phone to control the robot we build. For that we need to install a specific application that could transmit bytes of data serially through bluetooth. This in turn received by the controller via BT and move according to the command given by the smartphone. Here we are using an application called “Bluecontrol” which is provided with Graphical interfaces like buttons which will transmit a specific character to Microcontroller via Bluetooth.
UPDATE: Unfortunately the above mentioned app is removed from the Playstore. However there are plenty of free apps in Playstore which will do the job for this application.
#include<reg52.h>
sbit motor_pin_1 = P1^0;
sbit motor_pin_2 = P1^1;
sbit motor_pin_3 = P1^2;
sbit motor_pin_4 = P1^3;
unsigned char c;
void main()
{
P1=0x00; //set Port 1 to low
TMOD=0X20;
TH1=0XFD;
TL1=0X00;
SCON=0X50;
TR1=1;
while(1)
{
while(RI==0);
c=SBUF;
RI=0;
if(c=='U')      //move forward
{
motor_pin_1 = 1;
motor_pin_2 = 0;
motor_pin_3 = 1;
motor_pin_4 = 0;
}
else if (c=='D')     //move backward
{
motor_pin_1 = 0;
motor_pin_2 = 1;
motor_pin_3 = 0;
motor_pin_4 = 1;
}
else if (c=='R')
{
motor_pin_1 = 1;
motor_pin_2 = 0;
motor_pin_3 = 0;
motor_pin_4 = 0;
}
else if (c=='L')
{
motor_pin_1 = 0;
motor_pin_2 = 0;
motor_pin_3 = 1;
motor_pin_4 = 0;
}
else if (c=='C')
P1=0x00; // motor stop
}
}


No comments:
Post a Comment